Friday, January 28, 2011

Simple Valentine's Card

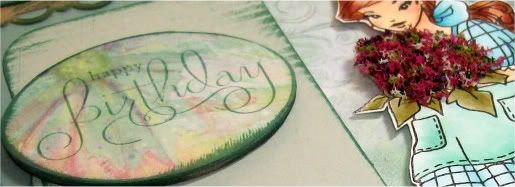
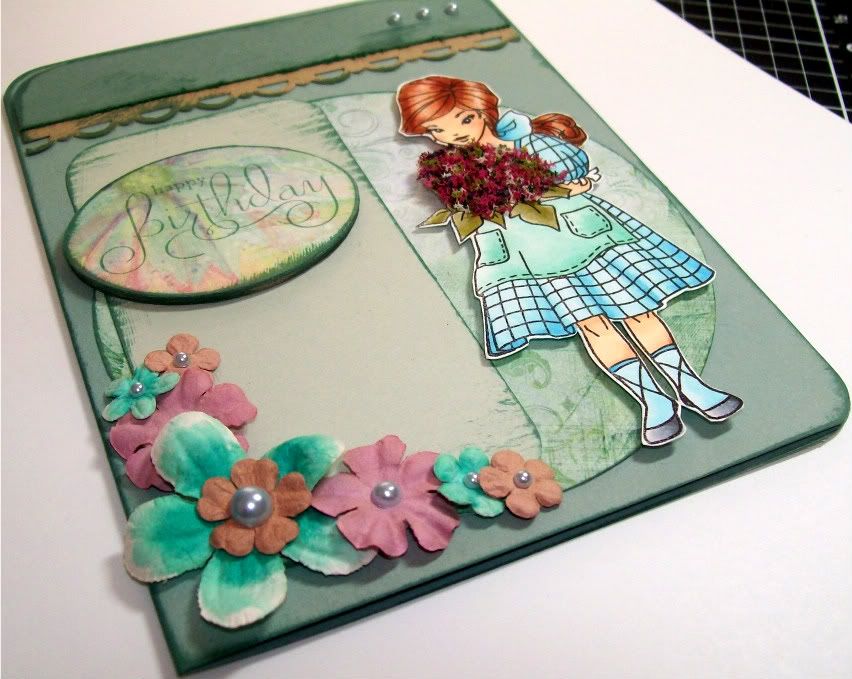
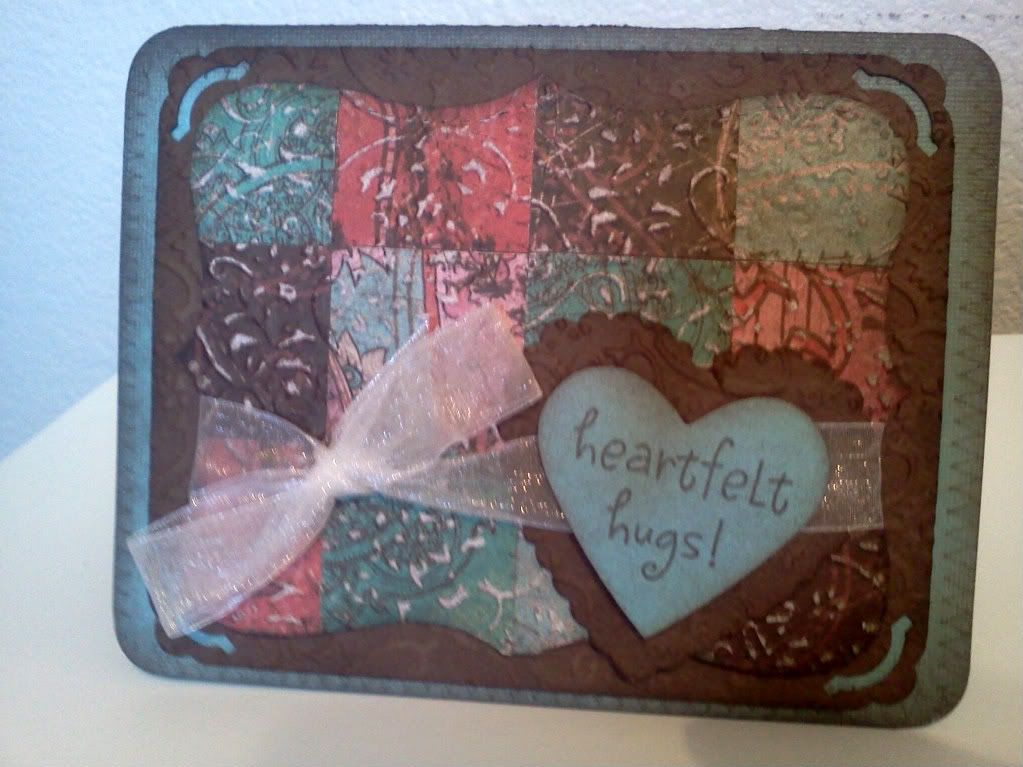
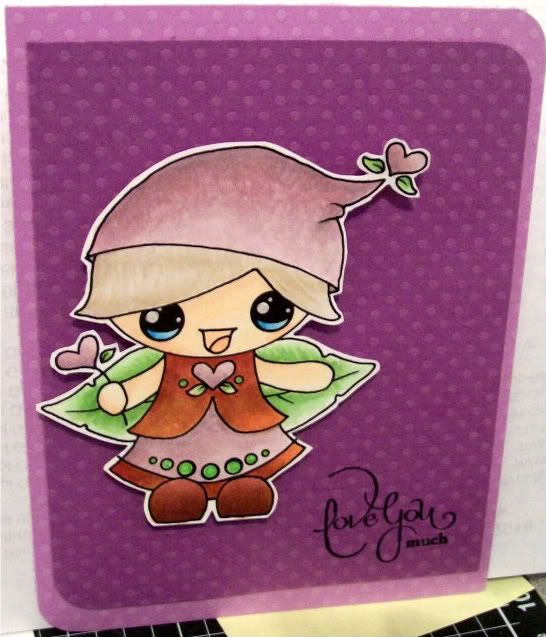
I decided to make a very simple Valentine's Card for my 4 year old niece.  Isn't this image adorable?  I found it here.  I had so much fun coloring this!!  I was able to use the Feathering technique as well as the Dirty Rag Technique.  Can you tell where I used them?  I actually used a sponge instead of a rag too! 

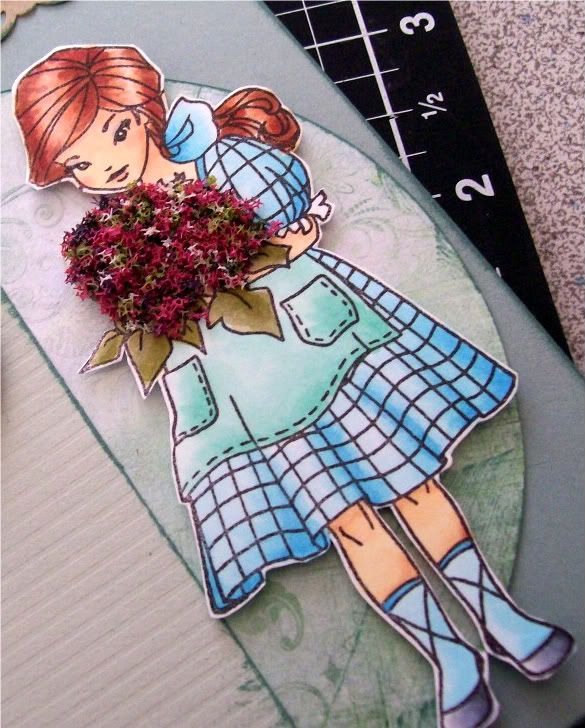
I feathered her hair (I wish the picture could show the detail).  Then I used the sponge sprayed with Blending Solution on the hat and shirt to add some texture.  
I just tried to keep this very simple so that it could be easily duplicated if needed for school too!

Hope you enjoyed looking!!


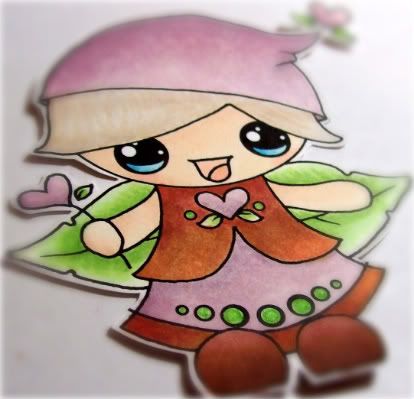
Skin: E50, E00, E21, YR01, RV00, R12
Eyes: B00, B02, B04, Clear Spica, Smooch
Skirt, Hat, Hearts: RV91, RV93, V95, Melon Spica 
Shirt: E97, E99, E09
Shoes: E17, E37, E29
Leaves: G20, YG11, YG13, YG17
Hair: E40, E42, E70, E31

thanks for looking!!!


Supplies Used: 
Stamps: SU! Well Scripted (No longer available)
Paper:   Dotted Swiss MultiPack
Ink:        Memento Tuxedo Black, Copics, Atyou Spicas, Smooch
Stash:    corner rounder    

Saturday, January 22, 2011

Whiff of Joy Card

So I thought I would try for the Whiff of Joy Guest DT spot that Katharina has posted on her blog.  I used one of my favorite WOJ Elizabeth Bell Stamp from the Blooming Spring Stamp Kit.  Plaese let me know what you think!

I love how the flowers look.  I used white paper flowers and colored them in with my Copics; BG10, BG11 and BG13.  I topped them off with Basic Grey half pearls.

I am really happy with how my coloring turned out!  I used the following copics and spicas:
Skin: E50, E00, E21, E11, R12
Eyes/Eye Shadow: BV0000, BV00, Pitch Black Spica, Opaque White
Dress: B000, B00, B02
Apron: BG10, BG11, BG34
Shoes: C00, C1, C2, C4, N6
Leaves: YG91, YG93, YG95
Hair: E11, E97, E13, E99, E17, E09, Clear Spica

thanks for looking!!!


Supplies Used:
Stamps:  Blooming Spring Stamp Kit, SU! Well Scripted (No longer available)
Paper:    PTI Ocean Tides, Kraft.  SU! Sage Shadow (No longer available), Prima Fairy Flora
Ink:        Memento Tuxedo Black, PTI Ocean Tides, Copics, Atyou Spicas
Stash:    Paper Flowers (CTMH and Kaisercraft), 3D element, FlowerSoft (Heather), Basic Grey Half pearls, corner rounder                                                                                                            

Thursday, January 20, 2011

My Cutterscreek Spring Layout


With all of the cold weather going around, I thought a Spring Layout would help set the mood for the wonderful temperatures that must be on their way. (Please!!!) 

I'll just share a quick background of the pics below as my husband isn't usually this, umm, odd.  Usually. 

They were taken when my hubby and I were dating.  He was a manager at a local Walmart over the electronics and photo areas.  Every Christmas and Easter, the photo lab provides 1 complimentary 5x7 of a picture taken with the Easter Bunny or Santa Claus.  This was one of my husband's favorite things as he got to pick who dressed up in the suit every time!  I had just gotten off of a LONG day from work and my mom and I were going to take him to lunch so we were able to see the tail end of picture time.  Can you tell he was bored a few times?  Thus the title "The Many Faces of Glen."  It just cracks me up looking at these and the Bunny's face never changes!  


I tried to keep it a masculine page with the colors but still keep it "Springish" looking.  I started with a 12x12 cardstock from Core'dinations and sanded the page; softly in the center for a lighter look and hard on the edges so they were nearly white.  I also used a Rich Cocoa ink over some areas in the center to darken it slightly as well.  I then used a light green Swiss Dot cardstock.  This is actually one of the best purchases I have ever made.  I use this paper for EVERYTHING.

I cut and corner-rounded the green to create mats for the pics as well as the "journaling area."  I also distressed it a little as I thought the green was a little too bright for what I wanted by again using my Rich Cocoa ink pad.  I used the pad again on the edges of the pictures as well.  I really liked how the pictures looked with straight corners over a rounded corner - -I think it adds to the oddness :o)  I originally created the layout with only the 4 larger pictures but decided to add the smaller with all rounded corners in the center.  


I used some Spring-looking stamps from Hero Arts that I picked years ago.  In fact, I think this is the first time I used them too!  They are stamped on Simply Smooth cardstock and colored with my handy copics and taped it all together with my new favorite Scor-Tape; can't live without it!!  All in all, this layout probably took about 30-35 minutes to make.  Definitely my kind of layout.  Hope you enjoyed!!


Copics used: G0000, YR000, YR01, R12, R30, RV0000, RV00, RV02, YG11, YG13, YG17, YG91, YG93, YG95  


Copics used: G0000, BG10, BG11, YR000, Y000, Y11, Y32, E11, RV0000, RV00, RV02, YG13, YG17, YG91, YG93, YG95, Pitch BlackPinkMelonBlack Multiliner


Supplies Used:


Thursday, January 13, 2011

Some Valentine Cards

So I decided to share some Valentine's Day cards I have made with my mom and our good friend KellyRae.  Let me know if you have any questions on the techniques!


This is one is probably my favorite.  I have never really been into extreme distressing; it just seems like a lot of work to me.  This one though was so much fun!  We pieced 1" squares together on adhesive paper and ran it through the Big Shot iwth a Stampin' Up! Top Note Die.  Then ran the die cut through again with a CuttleBug Textile Embossing Folder.  Then sanded it to bring out the embossed design and went over EVERYTHING with Brown ink to add to the distressing.  LOVE this card!


This is another favorite and fun technique.  The red swirl pattern was created by Me!  How cool is that!!  Shaving Cream, and ink refills randomly dropped (1 Red, 1 Pink, 1 Green) and swirled randomly with a popsicle stick.  Let it sit a few minutes and wipe off with a paper towl and . . . . Ta Da!!!  Your own marble paper.  The rest is a mixture of Stampin' Up! and The Angel Company Stamps with TAC paper as well. 


Here is another favorite very simple card.  2 separate TAC stamps sets were used; I remember the background is Circle Sampler :o)  I traced over the Love squares with a black pen to add a little definition and used Sakura Stardust pens to highlight the dots and LOVE on the background.  Stamper's Floss is used on the middle box. The below picture shows the glitter pen highlights better.


I really like this card.  I know its not the traditional pink and/or red you see at Valentine's but I thought it added a little class to it by using the gold and black.  This is another technique, a used dryer sheet with glitter to add a difused look.  Also, the gold is embossed so it has a lot of shine!  I just wish more of the glitter showed up in the picture below. 
Just a very simple, classy Valentine's card.


This last card is a gate fold but when it is opened, it has a hidden message.  It was a fun card to make.  Definitely need to make a few to get the pattern down right though. 


Well, hope you enjoyed looking!

Sunday, January 9, 2011

Sorry about the mess!!  My blogger crashed and I am slowly getting it back up.  Hopefully I will have something posted soon . . . .