Showing posts with label CTMH. Show all posts

Tuesday, April 19, 2011

Easter Card

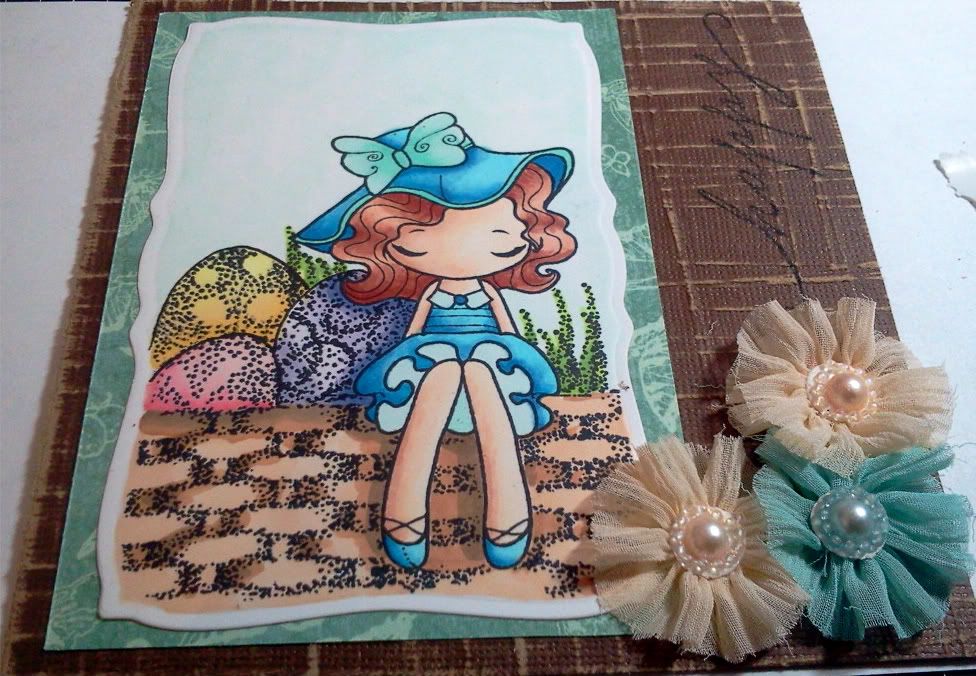
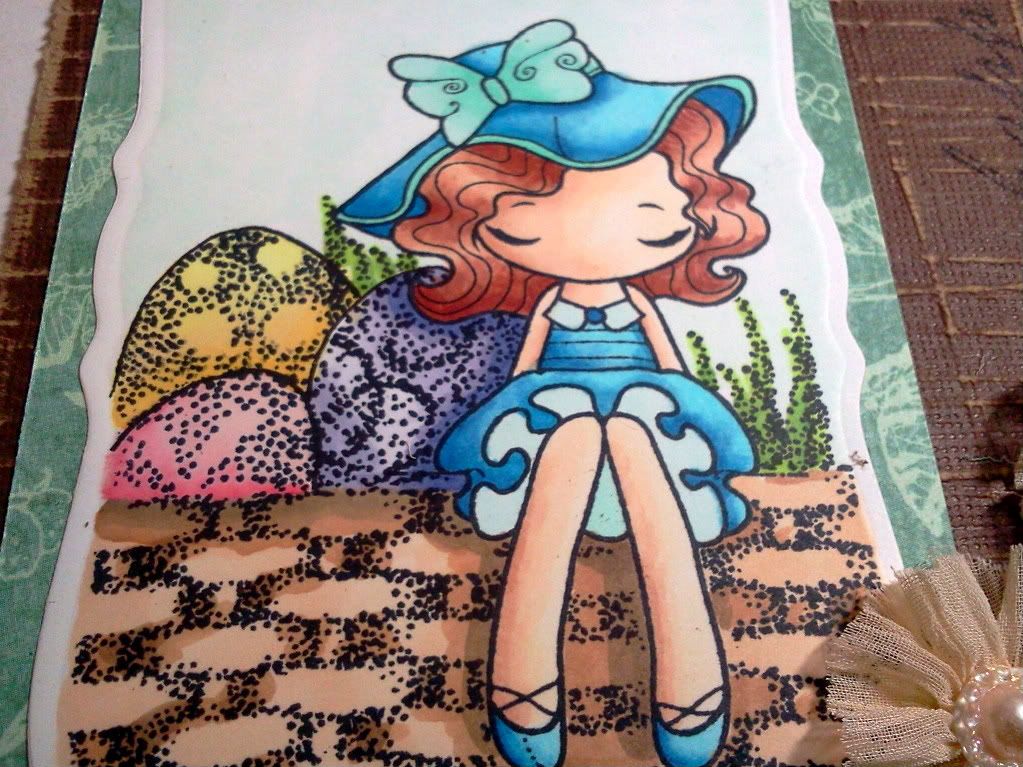
So I am trying so new techniques I learned at the Copic Intermediate Certification and decided to use the Miss Anya Dressy Collection as the stamps leave so much open for interpretation as far as shading and placement.  Making an Easter card I decided she should be sitting on the edge of a basket.  There was a lot of stamping and post-it notes involved; just as a reminder or hint, make sure you wash your hands between cutting the image on the post- it note and  placing it on your stamped image.  Ink spreads in case you didn't know :o)

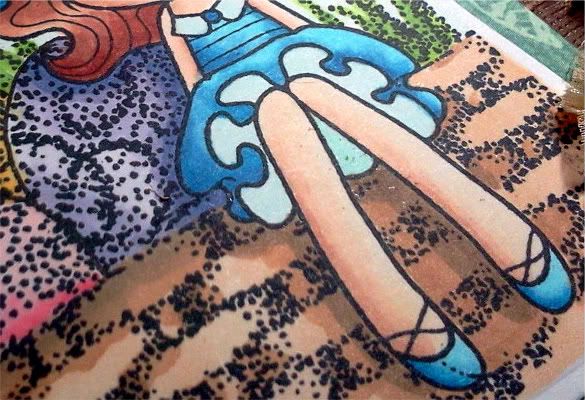
I used the Linear Light template from Marianne Walker's Shadows and Shading Book to determine my light source to create a  more realistic picture; the upper right side.  Now, I colored my images paying attention to shadows and cast shadows in particular.  Cast shadows are shadows created by an object being reflected on another surface.  Does it look like shadows of her legs on the basket and her hair and side on the eggs?


I cut out the stamp using Curved Rectangles, embossed the edges and placed this over some Graphic 45 paper to make it pop!  I than took some Core'dinations paper and sanded it to use as my card base.  I stamped 'happy' on the top right, 'Easter' is on the inside, and used the new Prima Flowers as a corner accent.  What do you think overall? 


Photobucket

Stamps: TGF- Miss Anya Dressy, CTMH Eastertime (Stash)
Paper: Bazzill Simply Smooth, Graphic 45, Cosmo Cricket
Ink: Memento Tuxedo Black, Copics
Embellishments: Prima Flowers: Aurora. Splash
Other: ATG, Curved Rectangles, Embossing Mat, Scor-Pal

Stash: Post-It Notes, Shadows and Shading Book by Marianne Walker

Basket:  E21, E34, E44
Sky:      G0000
Eggs:     BV0000, BV00, BV11, BV04
             R30, R32, R35
             Y11, Y32, Y35
Grass:   YG23, YG03, YG17
Skin:     E50, E00, E11, E13
Hair:     E11, E13, E17, E19
Dress:   B00, B14, B16, B26
Trim:    BG10, GB11, GB23 

Saturday, January 22, 2011

Whiff of Joy Card

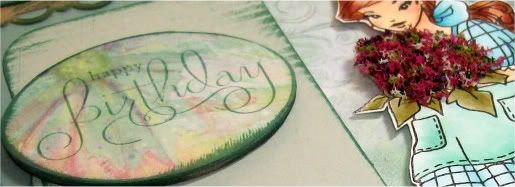
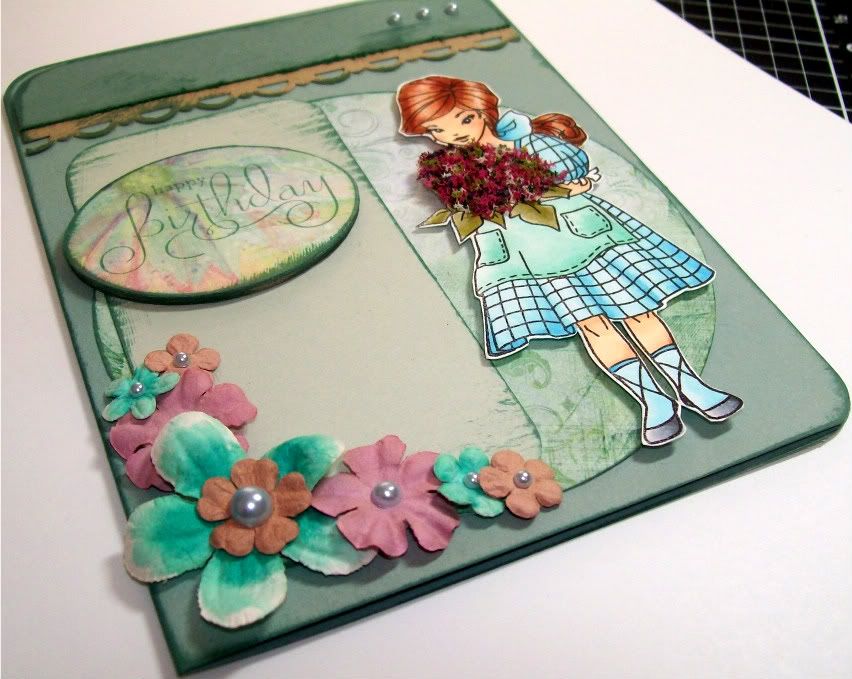
So I thought I would try for the Whiff of Joy Guest DT spot that Katharina has posted on her blog.  I used one of my favorite WOJ Elizabeth Bell Stamp from the Blooming Spring Stamp Kit.  Plaese let me know what you think!

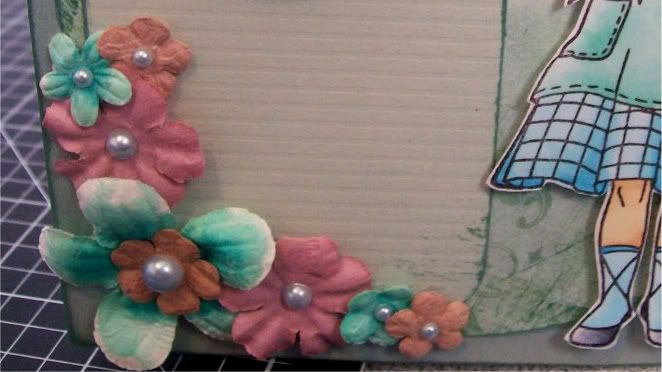
I love how the flowers look.  I used white paper flowers and colored them in with my Copics; BG10, BG11 and BG13.  I topped them off with Basic Grey half pearls.

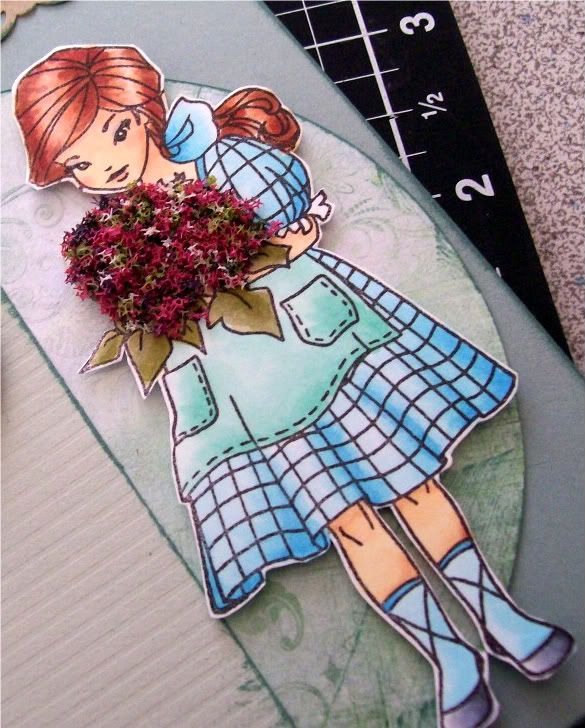
I am really happy with how my coloring turned out!  I used the following copics and spicas:
Skin: E50, E00, E21, E11, R12
Eyes/Eye Shadow: BV0000, BV00, Pitch Black Spica, Opaque White
Dress: B000, B00, B02
Apron: BG10, BG11, BG34
Shoes: C00, C1, C2, C4, N6
Leaves: YG91, YG93, YG95
Hair: E11, E97, E13, E99, E17, E09, Clear Spica

thanks for looking!!!


Supplies Used:
Stamps:  Blooming Spring Stamp Kit, SU! Well Scripted (No longer available)
Paper:    PTI Ocean Tides, Kraft.  SU! Sage Shadow (No longer available), Prima Fairy Flora
Ink:        Memento Tuxedo Black, PTI Ocean Tides, Copics, Atyou Spicas
Stash:    Paper Flowers (CTMH and Kaisercraft), 3D element, FlowerSoft (Heather), Basic Grey Half pearls, corner rounder                                                                                                            

Sunday, September 26, 2010

Neverending Card for CuttersCreek DT

Well I am finally back!!  Overtime has ended at work for the most part and I am now able to finally create again!  I have been hearing a lot lately about Neverending Cards so I decided to do some research and was able to make my own.  Now if you have no idea what I am talking about, it is perfectly fine!  I didn't know what it was either!  Below is a short video (under a minute) showing a completed Neverending Card and the 4 panels you create.  Hopefully it sparks your interest too!


Just in case it doesn't load for you, click here:

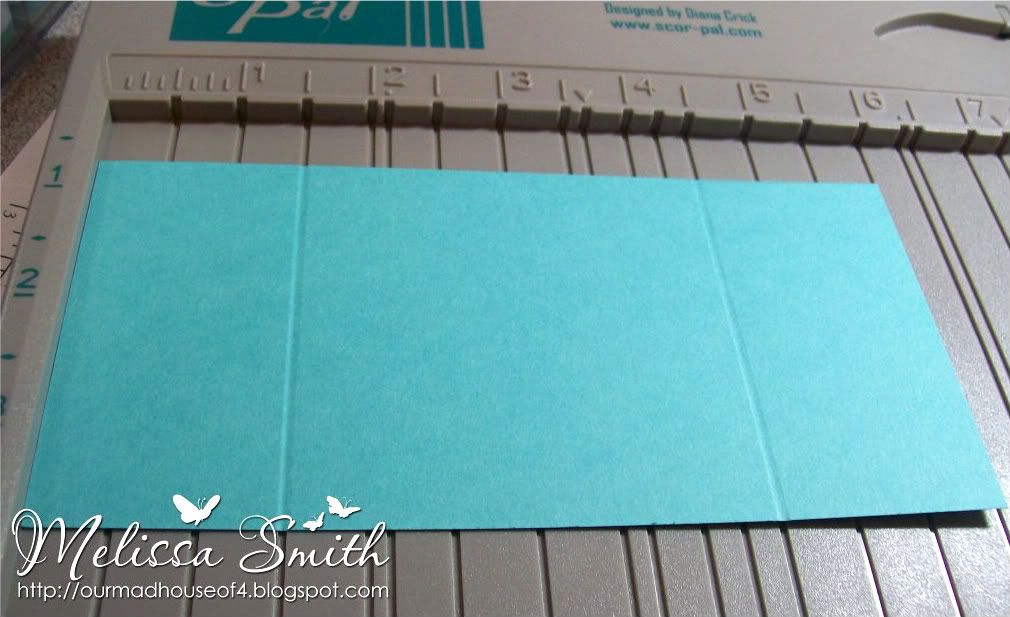
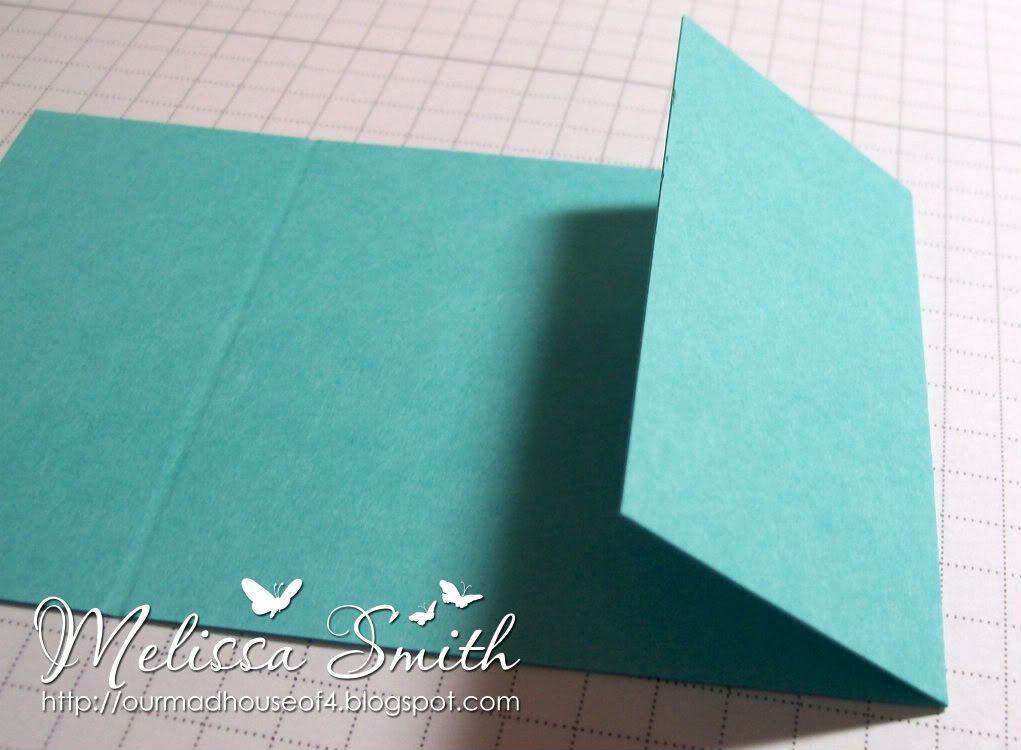
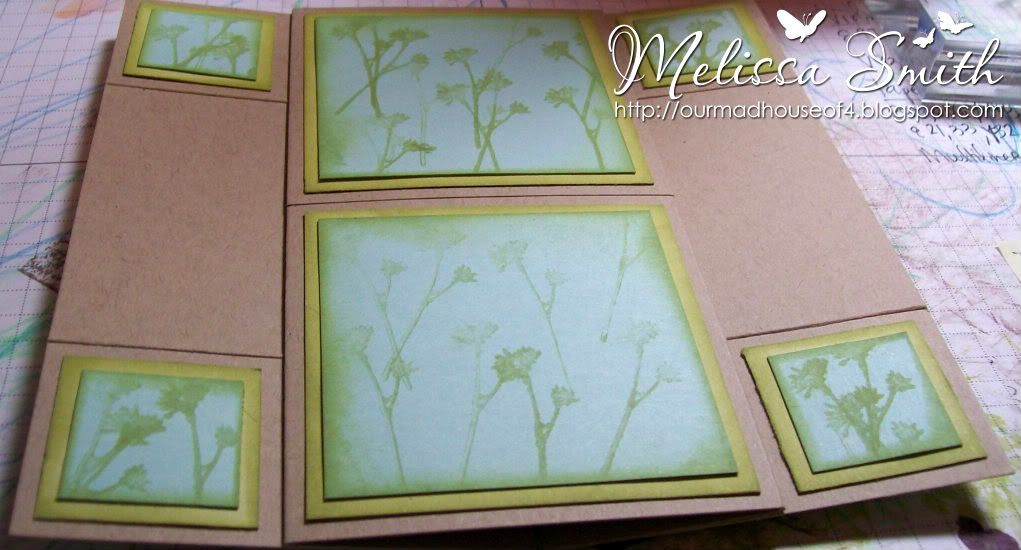
Ready to start making your own?  It is soooooo simple!  You will start with 4 sheets cut to 3" x 6" and scored at 1 1/2" on each side.


Next, you will want to go over each score with your scor-tool in both directions (with the scored portion on top and than on the bottom) This way it bends much easier after assembled. 
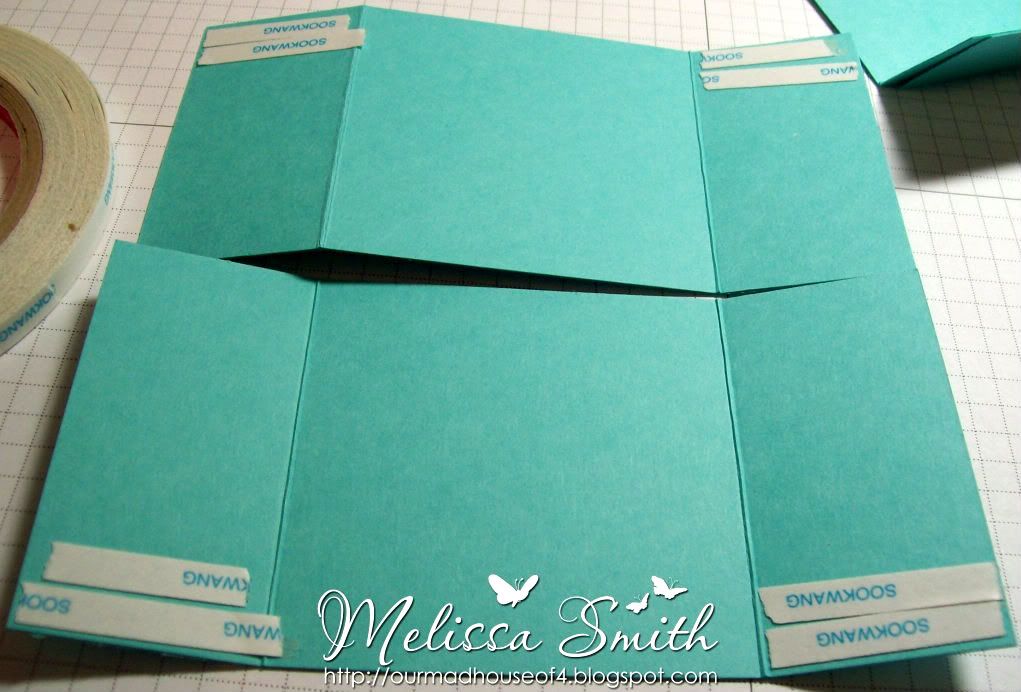
Lay out two of the 3" x 6" pieces horizontally and line them up evenly to apply tape to the 4 corners only. 
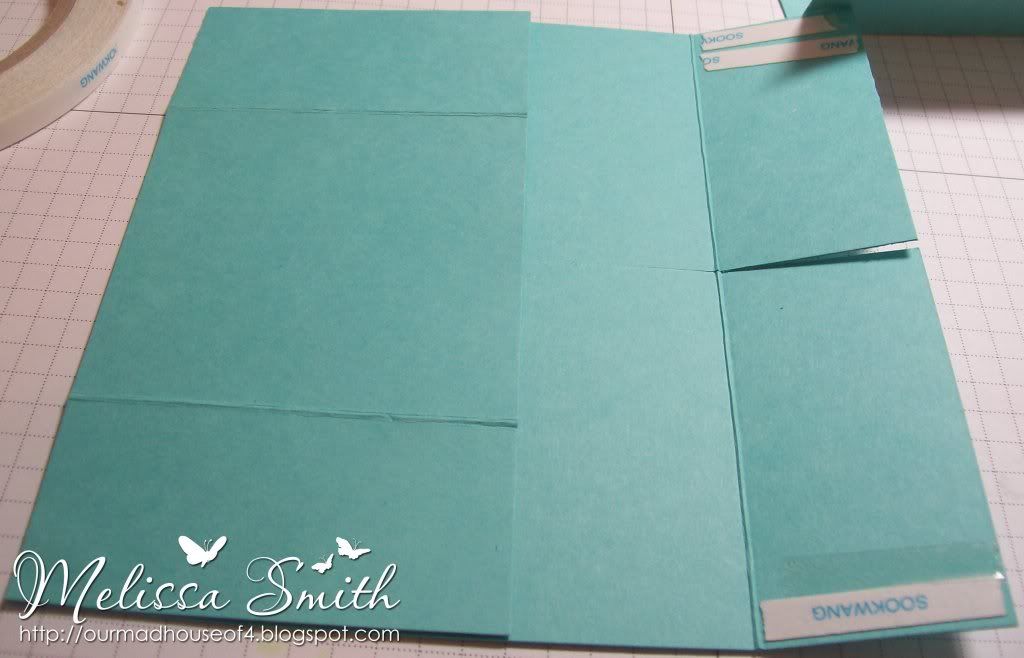
Take the 3rd sheet of 3" x 6" and lay it over one side vertically. Only remove the adhesive one corner at a time so you can line up the pieces perfectly.  (Ask me how I know this!)
The last sheet is extremely easy to apply as you really only need to line it up against the other vertical sheet.  But remember to still only remove the tape one corner at a time.

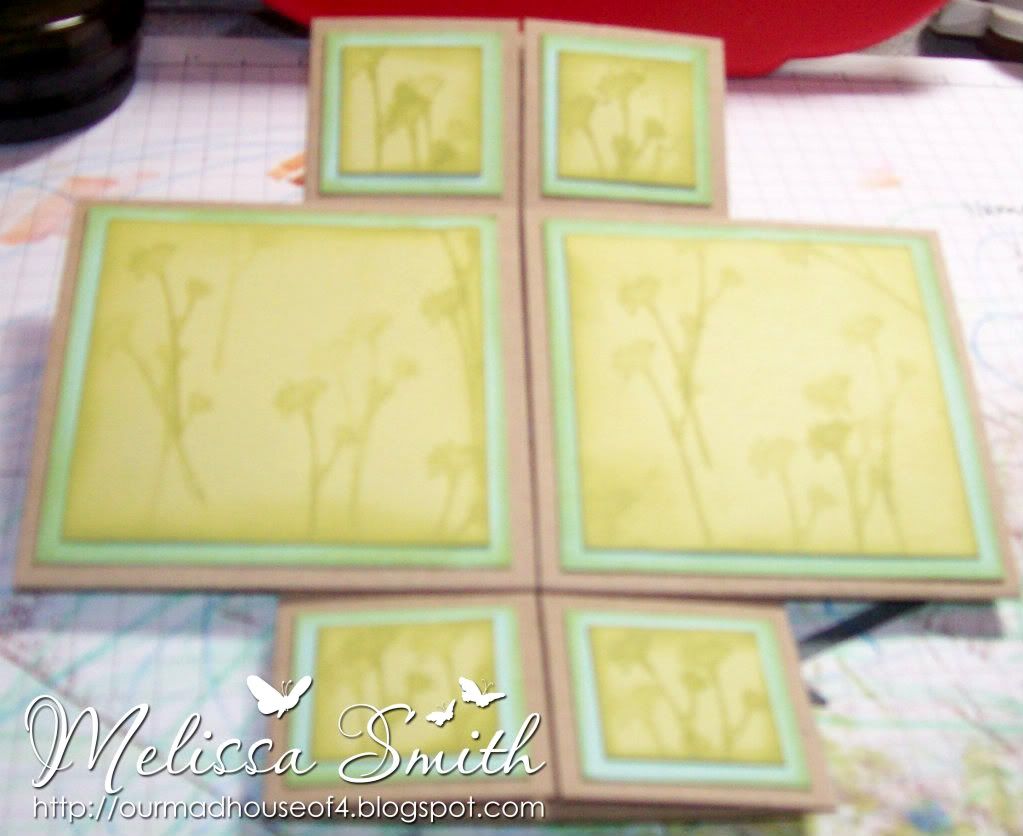
And here is your assembled card!


Just in case, here is the youtube link:


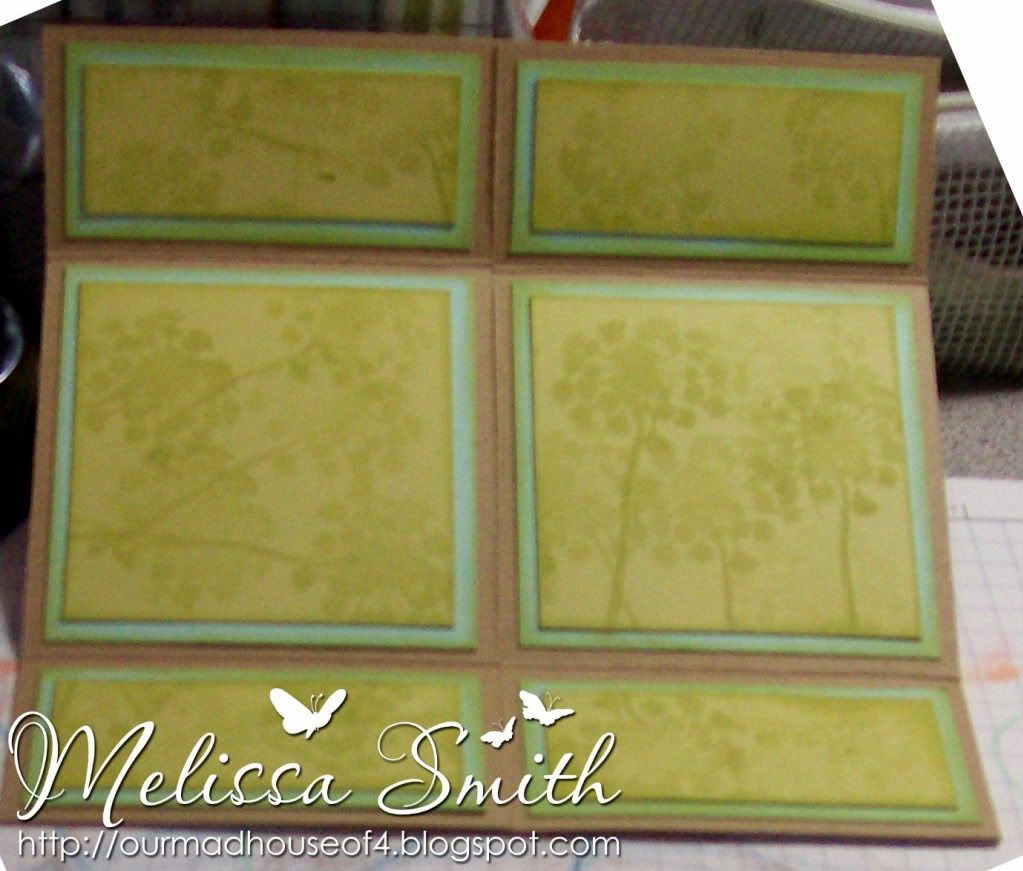
The next part is simple.  It is probably the most time consuming part because you are cutting out the sections for each of the 4 panels.  The measurements for each panel are below.  I am using color 1 and color 2 so you can see how I layered them.  Also, if you are going to be using layers, I would recommend using patterned papers or thin papers as cardstock makes the card very thick and heavy if you are mailing.

Panel 1:  Color 1:  (4) 2 3/4 x 1 1/4
              Color 2:  (4) 2 1/2 x 1
              Color 1:  (2) 2 3/4 x 2 3/4
              Color 2:  (2) 2 1/2 x 2 1/2


Panel 2:  Color 1:  (2) 2 1/2 x 2 1/2
              Color 2:  (2) 2 3/4 x 2 3/4
              Color 1:  (4)       1 x 1
              Color 2:  (4) 1 1/4 x 1 1/4


Panel 3:  Color 1:  (4) 1 1/4 x 1 1/4
              Color 2:  (4)       1 x 1
              Color 1:  (2) 2 3/4 x 2 3/4
              Color 2:  (2) 2 1/2 x 2 1/2


Panel 4:  Color 1:  (2) 2 1/2 x 2 1/2
              Color 2:  (2) 2 3/4 x 2 3/4
              Color 1:  (4) 2 1/2 x 1
              Color 2:  (4) 2 3/4 x 1 1/4


Now the best thing I have found about this card is that there are so many areas to fill that your imagination has free reign.  But, you are limited on your 3D embellishments as with all the folding it may not work properly.  I love simple cards so I was inspired by a discontinued CTMH set called Treasure Life - -lots of sayings and flowery backgrounds that can be used alone or mixed with each other.  So I used the flowers for my background inplace of a patterned paper and sponged like crazy!  I love how it turned out.  You can see how very little embellishments are needed after everything was stamped.  Some good stamps to try from Cutterscreek for this idea are:
Pink Cat Studio Garden Plate.
Inkadinkado Chandeliers, Filigree Fall, Leaves Galore, O Holy Night  (this would make an awesome Christmas Card!!!)
FlowerSoft Flower Foliage
Autumn Leaves Swirls V2

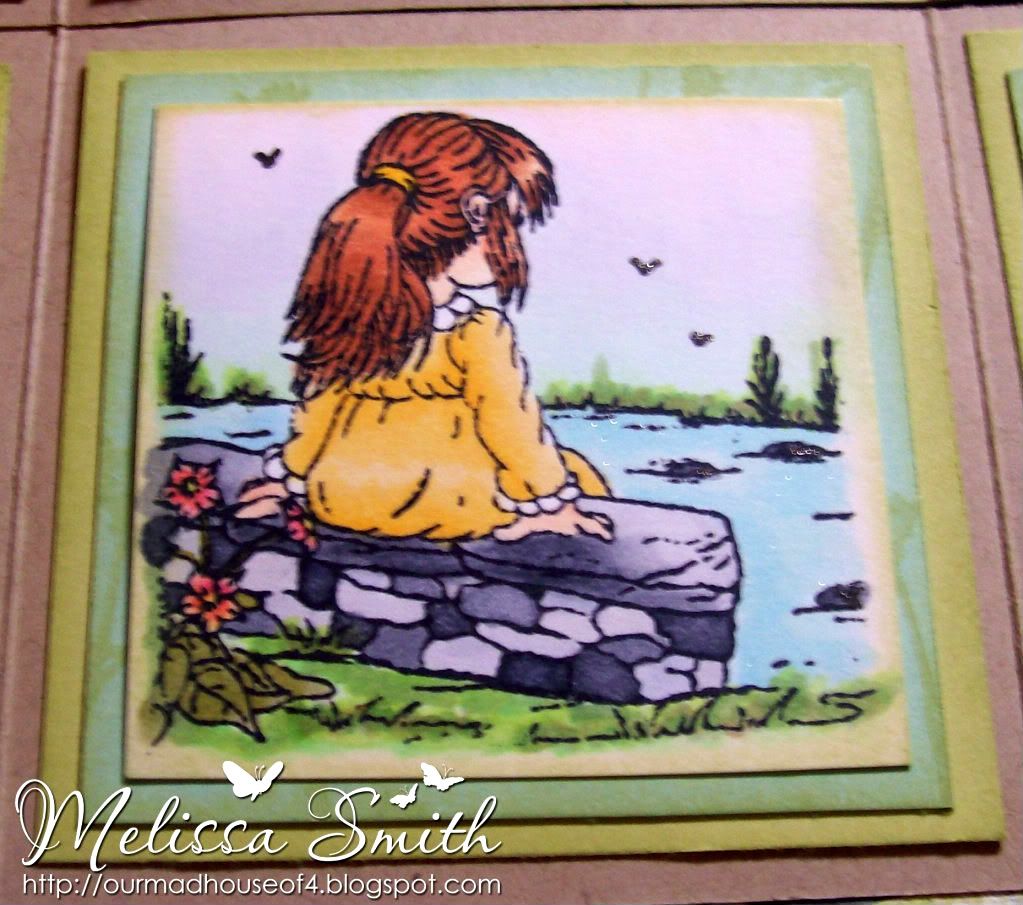
So here is my end result  Embellished and all.  First a close up of my last Panel.  I used an image from the Mini Hannah Collection from Pixie Cottage available at Cutterscreek.  I listed the copics used as well (they are in the order I used as well).  Let me know what you think!


Water: B000, B00, BG10
Sky: YG11, G0000, BV0000, RV0000, YR000
Skin: E50, E00, E02
Stones: N1, N4, N6, N9, C00, C2, T1, 0
Grass: YG03, YG63, YG17, E33, Covered with: YG11, YG06, YG03, YG63
Leaves: YG91, YG93, YG95
Flowers: Y04, R30, R32, R35
Dress: Y32, Y35, Y17
Hair Band: Y17, Y19, Y18
Hair: E33, E97, E99, 0
Spicas: Pitch Black (Birds), Clear (Water), Peach (Flowers)


Items Used from CuttersCreek:
Prism White Paper
Memento Tuxedo Black Ink
Mini Hannah Collection by Pixie Cottage
Copics
Atyou Spicas
Scor-Pal
ATG
Scor-Tape 1/4"

Additional from Stash:
PTI: Kraft, Aqua Mist, Spring Moss papers; Spring Moss ink
CTMH: D1306 Treasure Life
Bazzill Flowers
Paper Flowers from Stash

Monday, May 31, 2010

Paper Make Up Submission

Hello!  So today I am sharing some cards I made to submit for the call at Paper Make Up Stamps!  Hurry if you are interested as today is the last day to enter!!!

My first two cards I was experimenting on some sketches I found and with colors.  Now, I tend towards simple when I make cards but it also depends on who I am giving them to as I try and give something that fits individual personalities.  For these, I don't know who is getting them yet - -might send them in to OWH as they are always looking for cards! 

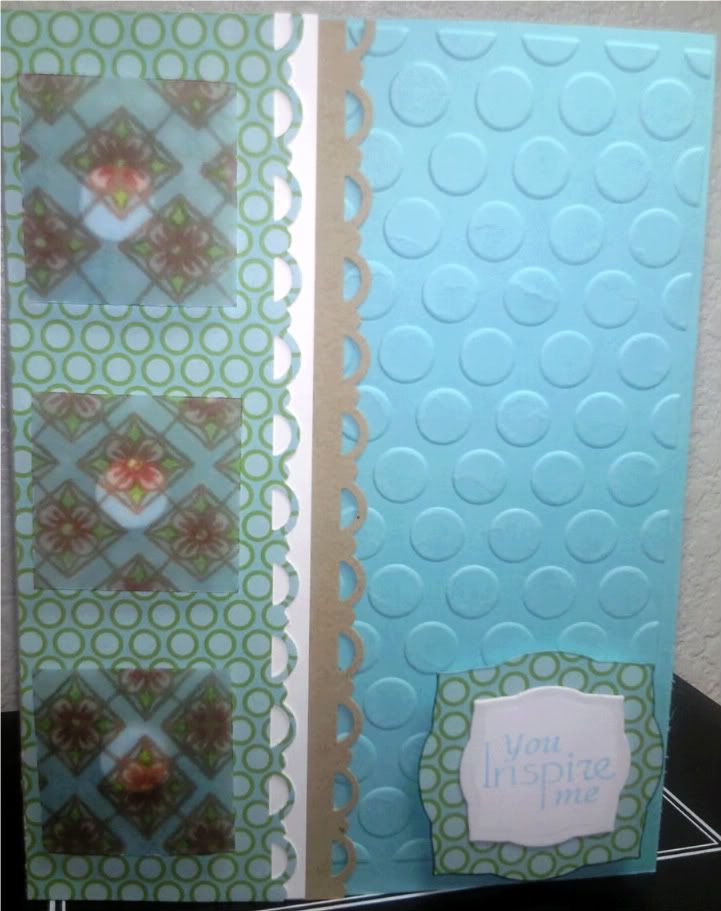
For this card, I LOVED the sketch!  The bottom right is the sentiment that is stamped in Hawaiian Shores so is a little light in the picture.  It reads, "You Inspire Me."  I cut it out with Nesties Label 3 and embossed the edge.  I ran my copic C0 along the edges so that it does not detract from the words themselves.  I used pop dots (which you can see on the cards under the vellum  - -may be awhile before I use vellum again!) 


Recipe: 
Paper: PTI- Hawaiian Shores, Kraft, Stamper's Select White, Green Boutique.  Vellum from my stash. 
Seeing Spots Embossing Folder
SU! Scallop Border, Nesties Label 3
Stamps: MTME: Sensational Sentiments, Argyle Amazement
Ink: Memento Chocolate Ink, Hawaiian Shores
Copics: Y35, R12, RV14, BG72, B02, YG13, YG17

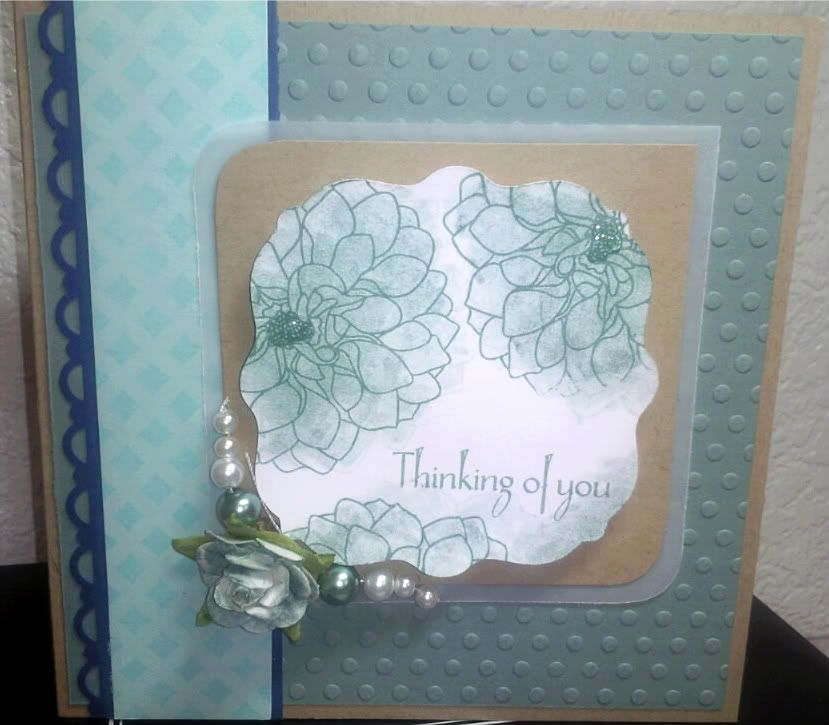
 My 2nd card is a 5 1/4" square card.  I used a new technique in this one - -I took some refill ink and diluted it to color in the flowers. I kind of like the way it looks, a softer version than coloring with my copics.  I stamped the Dahlia twice, first with Ocean tides and again with Versamark Dazzle so there is a slight glimmer.  I also added glaze tot he centers to make them pop a little more.
Recipe: 
Paper: PTI- Ocean Tides, Kraft, Stamper's Select White, Enchanted Evening, Aqua Mist.  Vellum from my stash. 
Polka Dots Embossing Folder
SU! Scallop Border, Sentiment shape cut with Cricut, Corner Rounder
Prima Flowers -French White, pearls from stash
Stamps: MTME: So Sentimental, PTI Delightful Dahlia
Ink: PTI Ocean Tides, Versamark Dazzle Champagne, CTMH -Breeze, Colonial White

My third card is by far my favorite!!  I wanted to try something a little different so I turned the background label.  I really like how it makes the image pop even more (plus so the pop up dots!)  If you can't tell yet, these shades of bluish -green are my FAVORITE colors.  So hopefully they don't bore you too much!

Recipe:
Paper: PTI- Ocean Tides, Ripe Avocado, Stamper's Select White, Green Boutique. 
SU! Scallop Border, Nesties Label 3, eyelets from TAC, PTI Hawaiian Shores button
Stamps: MTME: Sensational Sentiments, TGF Miss Anya Collection
Ink: PTI Ripe Avocado, Memento Tuxedo Black


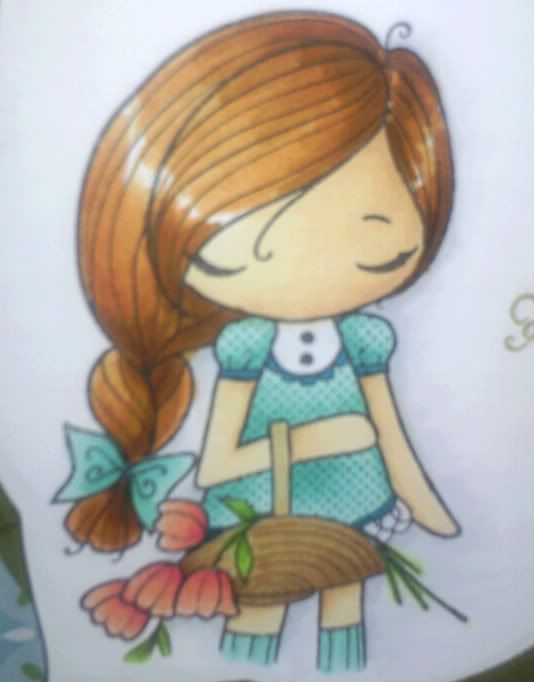
Copics: I have them grouped in areas colored: (E37, E99, E97), (E21, E11, E00, E50), (C0, C00, BG49, BG13, BG34, BG23, BG11), (RC14, R32, R12), (E25, E33, E31), (YG13, YG17), (C2, C1, C0, C00)


Here is a close up of Anya as I LOVE how the coloring turned out for her!  Bytheway, the copics listed above are show from top to bottom so if you like the combo there ya go!
 
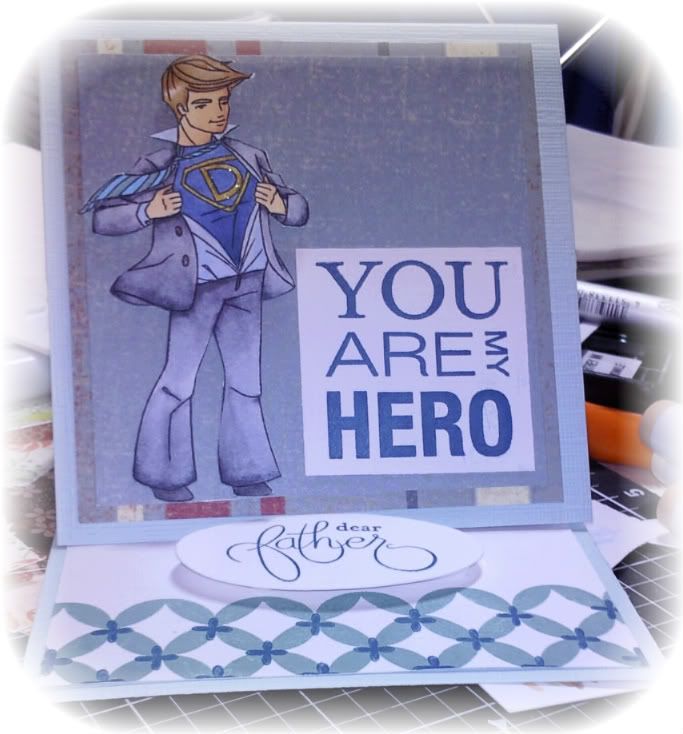
My final card is the Father's Day card I posted last week as I believe these last two cards truly show "Me."  I truly love this card as well especially how the suits ended up as coloring them was so much fun!!
Recipe:
Paper: From my stash -Bazzill, PTI Stamper's Select White.

Card cut with Cricut 4x4 easel card.
Stamps: Lady Bug and Friends Dad, Dude or Darling?, CTMH You are my Hero, SU! Well Scripted. MTME Sensational Sentiments (Inside), Puckered Up Patterns


Ink: Memento Tuxedo Black, PTI Enchanted Evening.
Copics: again in order from top to bottom.
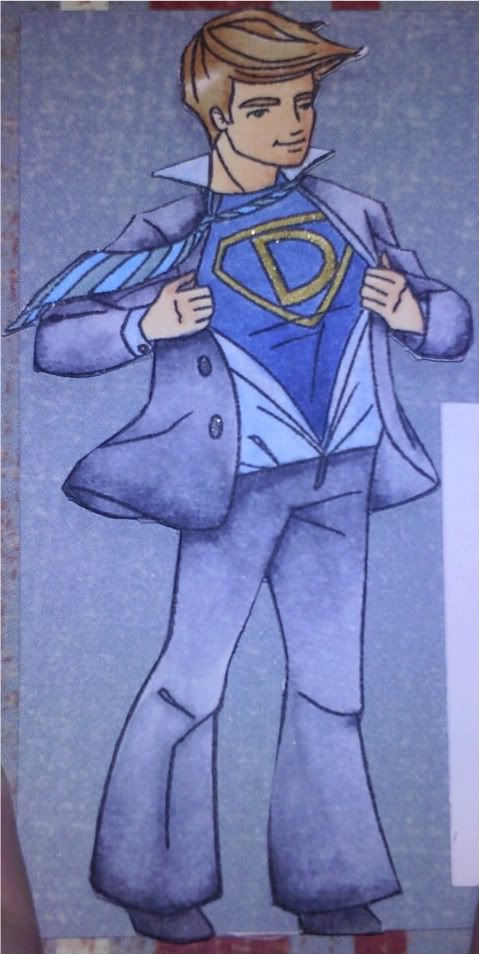
(E33, E31, YR00), (E21, E11, E00, E50), (110, C7, C5, C4, C3, C2, C1, C0, C00, Spica Silver), (B00, C1, C00, BG72), (B97, B34, B23, B21, Spica Gold), (N6, N4, N1).

Here is a close-up of Dad!  Isn't he gorgeous!  

I am so proud of how these cards turned out and I truly hope you enjoy looking at them! I just love coloring with copics and how they make me feel like a real artist! I hope you enjoyed these cards as I thouroughly enjoyed making them!!   Thank you for looking!